Where we left off: We had just put our first beer into the fermentation bucket after taking our original gravity reading. Typically there are two ways to determine the amount of time in for fermentation, a bubbles per minute rate, or a suggested time on the recipe. Bubbles per minute is a good guide because each recipe is going to create different amount of alcohol and require different fermentation times. Your fermentation is done when you see a bubble in the airlock at a rate less than 1 bubble per minute.
It will take 12-24 hours after yeast addition to start to see your first bubbles. Maintain a cool, consistent temperature. If the temperature drops too low, then the yeast can go dormant and fermentation will prematurely cease. If there is any daily fluctuation of temperature, there is a risk of straining the yeast and that will affect your flavor. We put our brew into a spare bath tub. The bonus of being in a bath tub is if there are any leaks, or over bubbling from a vigorous fermentation, clean up is a breeze.
Some beers will have a rather vigorous fermentation and others will slow and steady make it to the end of the race. Either type of bubbling is fine because there are many factors that affect the bubbling rate. If you have more space in your primary fermenter, then you will have a less vigorous fermentation. Depending on the amount of sugar in your recipe, you will also have more or less bubbling. Just keep an eye on the brew to make sure the beer is not bubbling out the airlock or the airlock has not been dislodged.
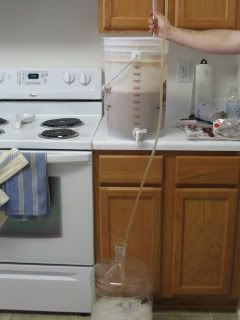
After a week, we transferred our beer to a carboy for secondary fermentation. Our main goal was to achieve a greater clarity of the beer. When transferring the beer, you do not want to disturb beer. The best way to do this is by racking the beer into the carboy.
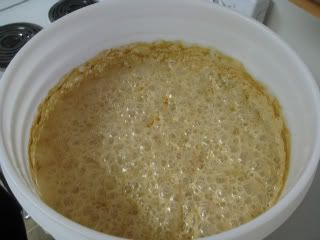
Beer after removal of lid - lots of good bubbles!

Racking beer into the carboy

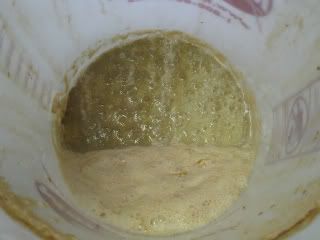
When racking your beer, make sure not to collect any of the dead yeast from the bottom of the bucket.
Yeasty stuff on the bottom of the bucket

Then once again put the lid on your carboy and place the carboy in a cool, dark place.
Some recipes do not require a secondary fermentation. This particular recipe did not require it. We choose to do a secondary fermentation for a few reasons. 1. Beer, like wine, gets better with age. Since we are kegging the beer, we wanted to do any 'aging' before putting the beer into a keg. If you are bottling, aging the beer can take place within the bottle. 2. We wanted to get better clarity on the beer. The addition of honey into this recipe gave a very cloudy product and we were hoping to use the aging to improve this. 3. We sampled the beer during the racking process and detected a yeasty taste, which is typical for most wheat beers. But, it was rather strong, and if we have the option to let some more yeast settle out of suspension, then we'll take it. 4. Most of the beers that D wishes to brew are higher gravity beers that require a secondary fermentation, so this was good practice.
Due to our schedule, the beer stayed in secondary fermentation for over two weeks. This is fine and will not hurt your product. However, it is not recommended to leave your beer for extended periods of time in the primary fermenter post fermentation because the dead yeast will break down in a process called autoylsis. This can leave a bad taste with the beer. Plus with your primary fermenter free, you can start your next batch of beer! So do any aging/clarity in either a secondary fermenter or a bottles.
When we were done with secondary fermentation, we prepared our kegging system by sanitizing the lines and the keg itself, along with the racking cane. Once again, follow all instruction on your particular sanitizing product. With that complete, we were only had to rack the beer into the keg. Don't forget to take another gravity reading to determine your percent alcohol in your beer
Our next blog will cover carbonating your kegged beer and the final product review of our first home brew.
No comments:
Post a Comment